Setting up a copy camera
Even though scanning prints on a flatbed scanner is fast and easy, a little extra attention to detail can save a lot of post-processing work. One of the most important things is to make sure that the scanner glass stays streak free and clean for every print.
My old Epson 4990 flatbed produces high quality scans, but it often sits idle for months, during which time a haze builds up on the underside of the glass from the outgassing of the internal plastics. I don't want this haze in my scans, so before each session, I carefully lift up the top assembly and clean the underside of the glass with streak-free glass cleaner and a microfiber cloth. I do this so often that I don't even bother putting back the screws to secure the lid to the base.
On the top of the glass, even a gloved hand can leave a nasty smudge, so I wipe that clean before laying down every print.
This process works great for images up to about 9x12 inches, but for larger prints, I use a camera and copy stand.
data-caption="Leveling the camera. This old copy stand is sitting on top of a rolling file cabinet. The pole and camera mount can be removed for easy storage. Gear that can be easily disassembled is helpful in a small space.

My copy camera stand doesn't have lights, so I use swivel-arm lamps at a 45-degree angle on either side of it. I keep the lights far enough away to allow for a 1/15 - 1/30 second exposure to avoid any horizontal banding from the LED lights that I use. (I first noticed this banding with my Iphone.) I set the camera on manual and measure the light with an incident meter.
I use a 55mm f/3.5 Nikon macro lens on my D610, stopped down to f/8 or f/11. The 55mm has a recessed front element which reduces flare from the lights, and the focal length allows me to fill the frame without raising the camera too high. Black paper extends the lamp hoods and reduces the amount of light bouncing back from the ceiling and walls. I wear dark colored clothing and use a cable release to keep any reflections from my hand or clothing away from the print.
A level verifies that the camera and baseboard are parallel. I set the camera for ISO 100, meter the light and set the white balance with a white card. The images are sorted to minimize column height adjustments while I work through the stack. I use back-button focusing on every image and change the lens opening according to the brightness of the images. I quickly check each image's histogram to make sure there is no clipping of the highlights or shadows. The camera outputs both NEF and JPEG files.
A metal base can be useful for holding down wide-bordered prints with small magnets. Low-tack tape is also an option. RC prints will usually lay flat on their own. A self healing mat with a grid also makes a good base, and the grid can help verify camera alignment through the viewfinder. Placing a sheet of glass over the image is an option, but there is always a chance that Newton's rings will ruin your copy work.
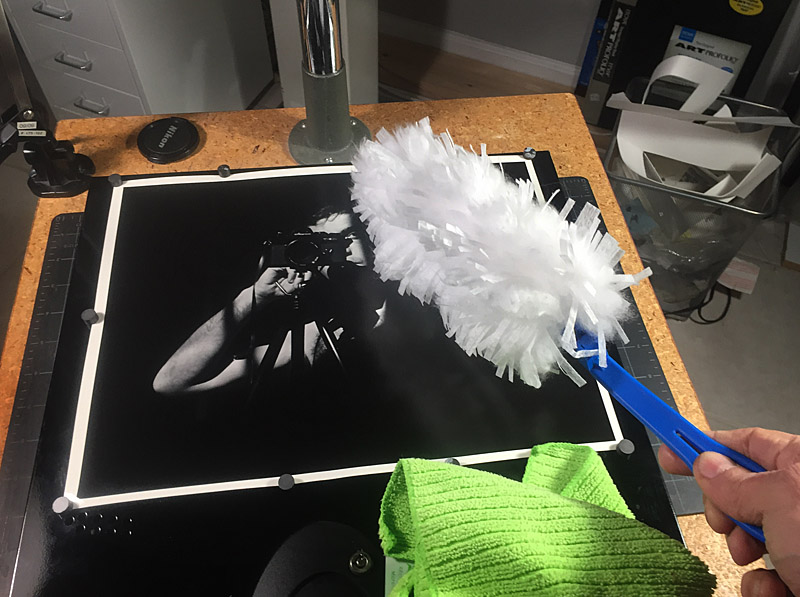
I used the removable side panel from my computer so I could hold down the edges of the print with magnets. A microfiber duster removes dust from the print. Notice the room reflections on the surface of the print. It's important to eliminate these. A cable release also helps keep reflections of your hands, arms, and clothing away from the print.


With this easy and economical setup, I was able to copy about 90 prints in just under a couple of hours.